Welcome to the ultimate diode guide
By the end of this you should know everything you could ever want to know about diodes when it comes to keyboards.
Table of contents:
- What is a diode
- why we use them
- Diode packages and foot prints
- How to solder diodes
- Other uses
- Links
What is a diode
A diode is a very simple fundamental electronic component.
So what a diode does is only alow electricity to flow in one direction. They will alow electricity flow in the other (wrong) direction when pushed hard enough.
(For completeness I will add that there are some diodes that almost never lets electricity flow ) that tidbit is a little out of scope of this article. More info in other uses in keyboards. But lets continue to the next section in seeing why we would only want electricity to flow in one direction.
Why we use them

So in our standard keyboard matrix we have one diode per keyswitch that is connected the the row on one side and the key switch on the other. The other pin of a switch is connected to the the column.
Each row is connected to one pin on our microcontroller, and each column is connected to a pin. So now we know the parts involved and how to wire it but lets talk about why.
So lets make a very simple fantasy firmware call it Foo-MK, in our firmware we need to tell the computer when a key is pressed. So we need to figure that out for our selfs, how do we do this we know that we have a n number of row pins and n number of column pins. What we will do is loop over every column and for each column pin pull it high ( meaning that we make that pin output 3.3v or 5v ). Next we will scan every row pin and see if any of them are being pulled high ( note we did not set them high so they would default to low or 0v). If we then find one that is high we can assume its because the switch at that intersection is being pushed.
Thats all well and good but what does the diode do you my rightly be thinking. Well lets get into an edge case.... well something that may seem like an edge case but happens all the time. We push 2 keys at the same time ⁀⊙෴☉⁀. Lets go over what would happen if we had no diode, electricity will flow through the switch and out into the rest of the switches pulling unexpected pins high, leading to false presses aka ghosting. With our diodes installed we limit the the electricity from flowing backwards and pulling unexpected columns high.
Other options
Now diode matrixes are not the only game in town to solve this problem.
another way of dealing with this is simply dedicate a single pin to each switch.

Now you say great but my microcontroller only has n number of pins and I want n+1 keys, no worries use a port expander.
But lets get back to the star of our show the humble diode in our next section we will look over the different packages diodes come in and no I don't mean bags or boxes ;).
Diode packages and what they look like
So we know why we want a diode but what in the heck do they look like?
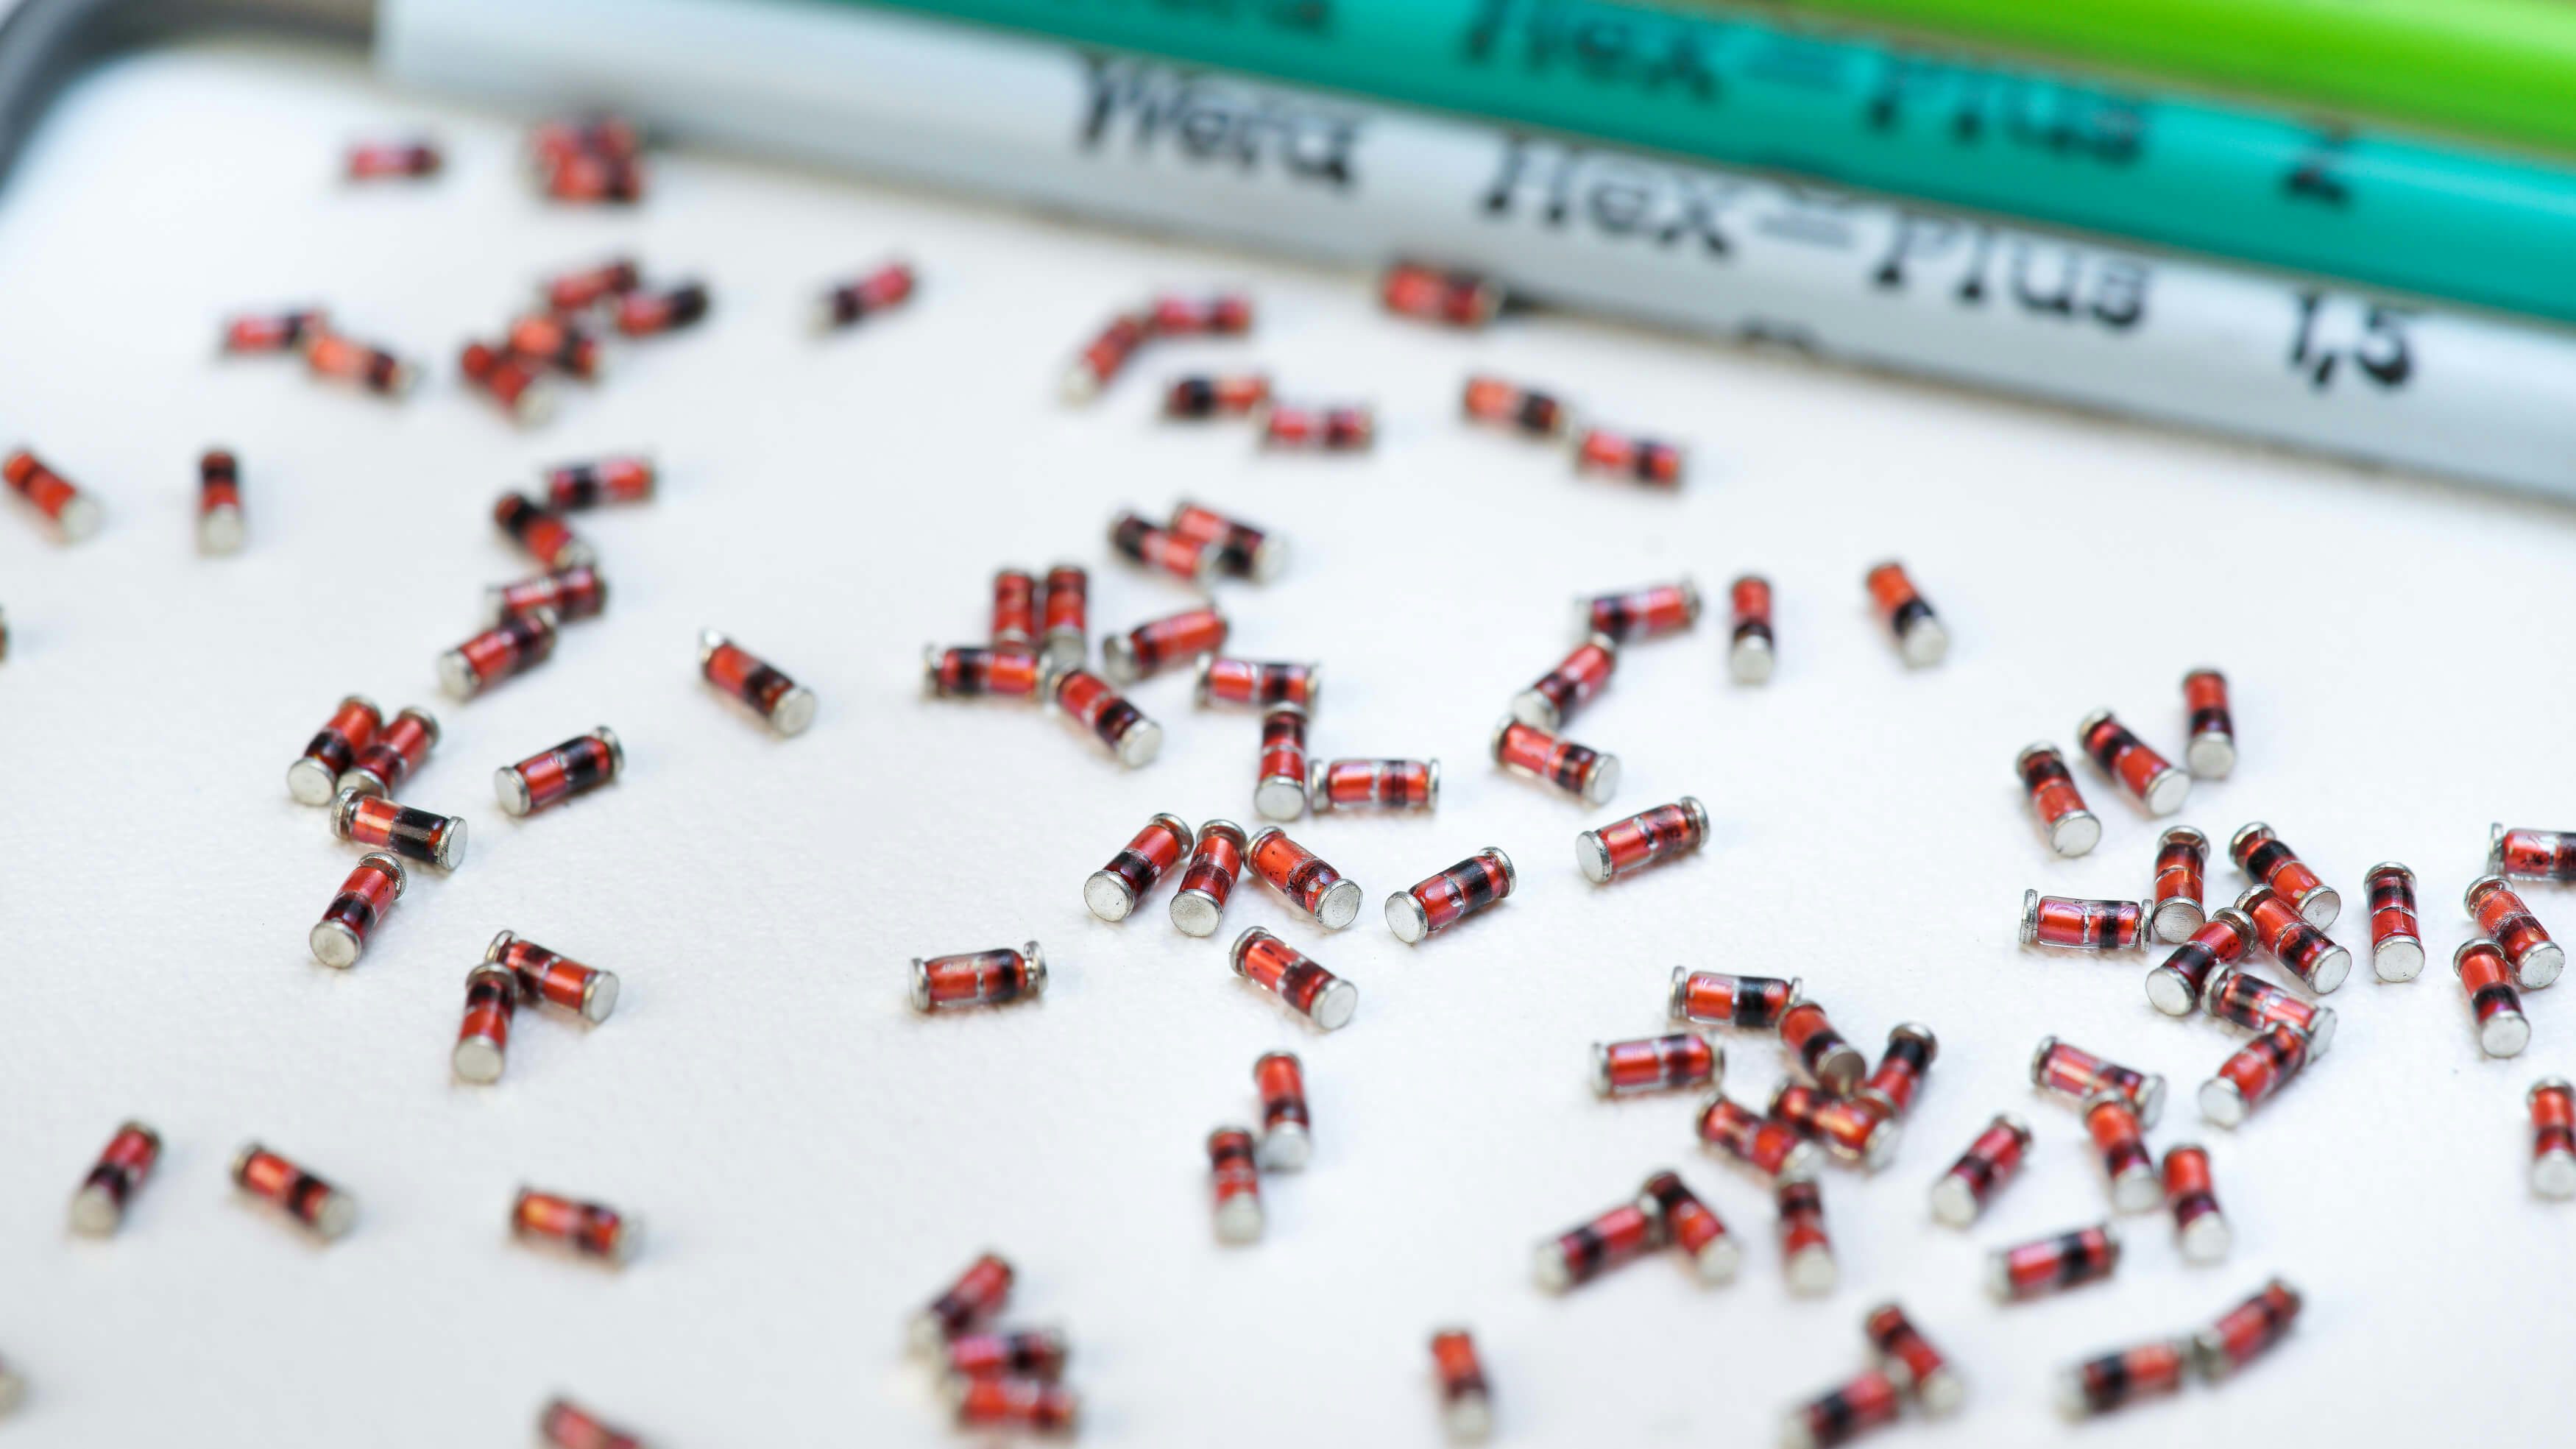
Through hole

this is what a uninstalled through hole diode looks like.
You will likely notice that they don't look the same, But they have things in common. All diodes will have a marking on them to indicate the direction that electricity will flow. Above and on most diodes the marking is a black bar( on a glass diode ) or a white / grey bar on black diodes.

You can see here that to install them the legs of the diodes have to be bent. The reason you would use a through hole diode is because of there ease of soldering, this comes at a cost of taking up space in our PCB.
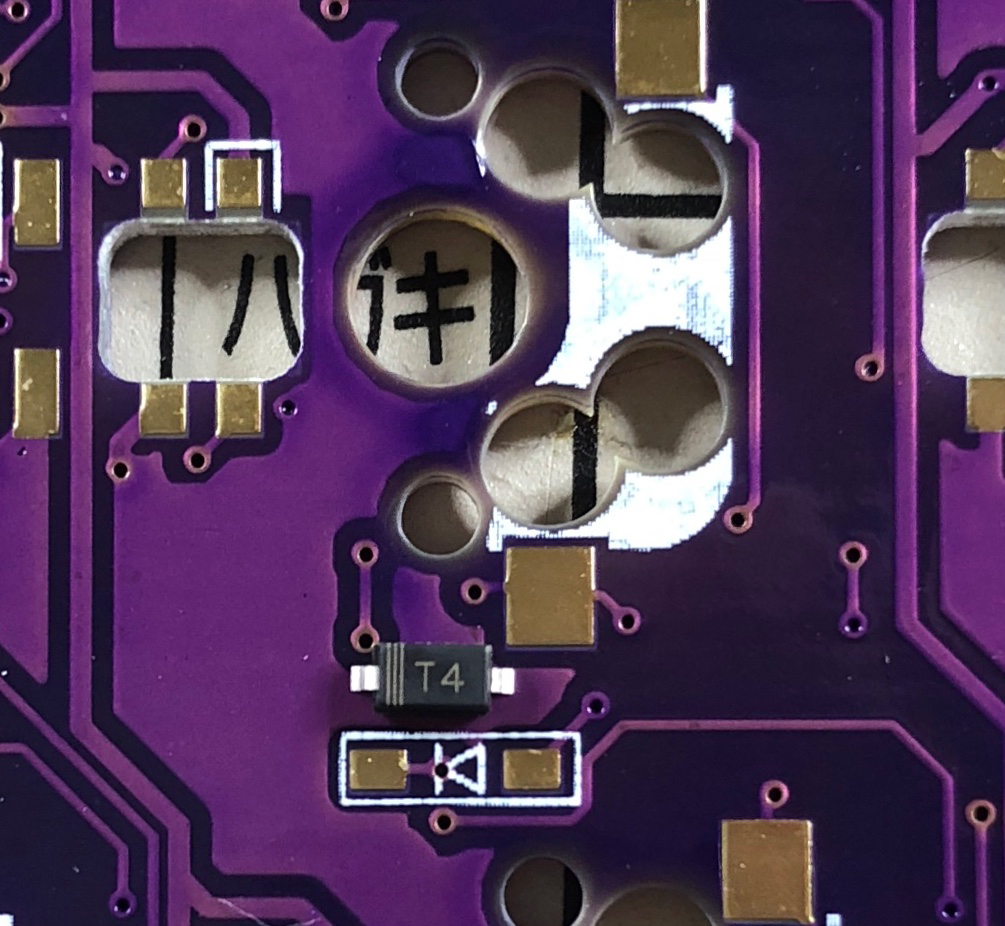
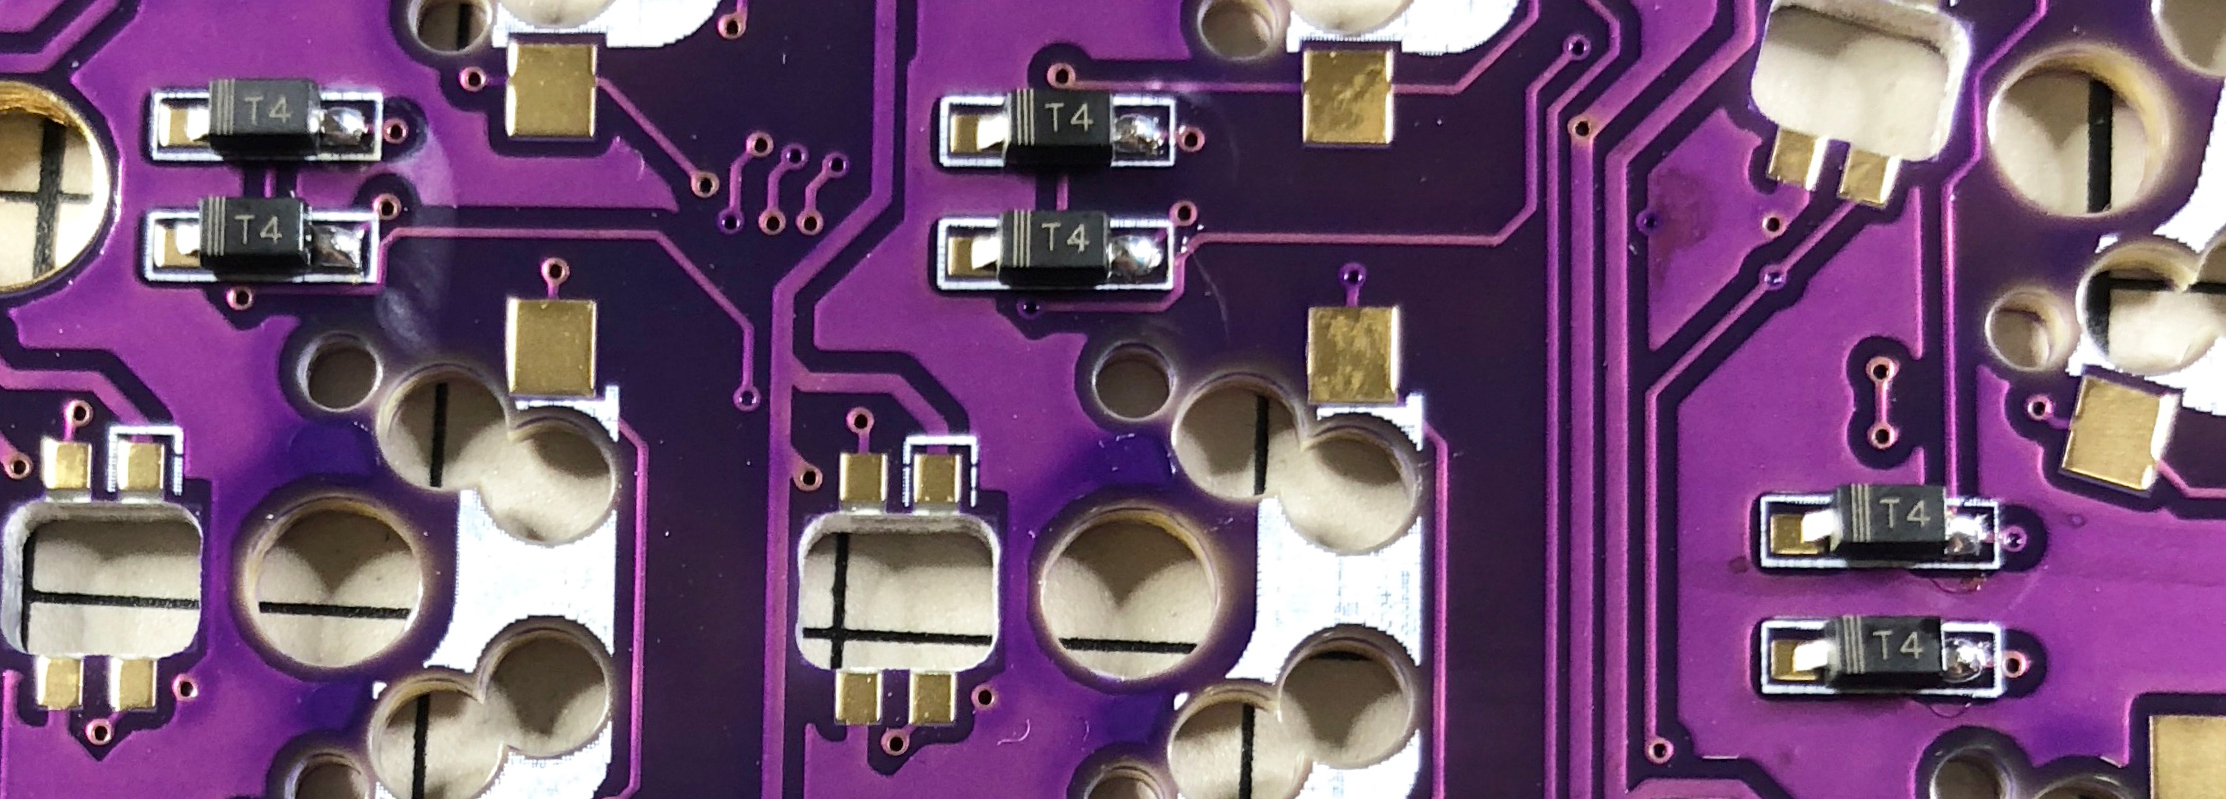
SMD

Again you can see that they may look different much like the through hole diodes they are equivalent and work the same it is a matter of taste weather to go with mel package (glass) or the more traditional black smd diode.

Here you can see just how much smaller a smd diode is on the keyboard. Once you get used to it soldering them is not much harder and a lot faster (even if your hand soldering).
One other package
The last package I want to bring up is the diode bank, these are several smd diode put together. while not very common to build with you can find them in a lot of keyboards due to the lower component count. Witch saves space on your pcb and saves you money when having your PCB factory assembled.

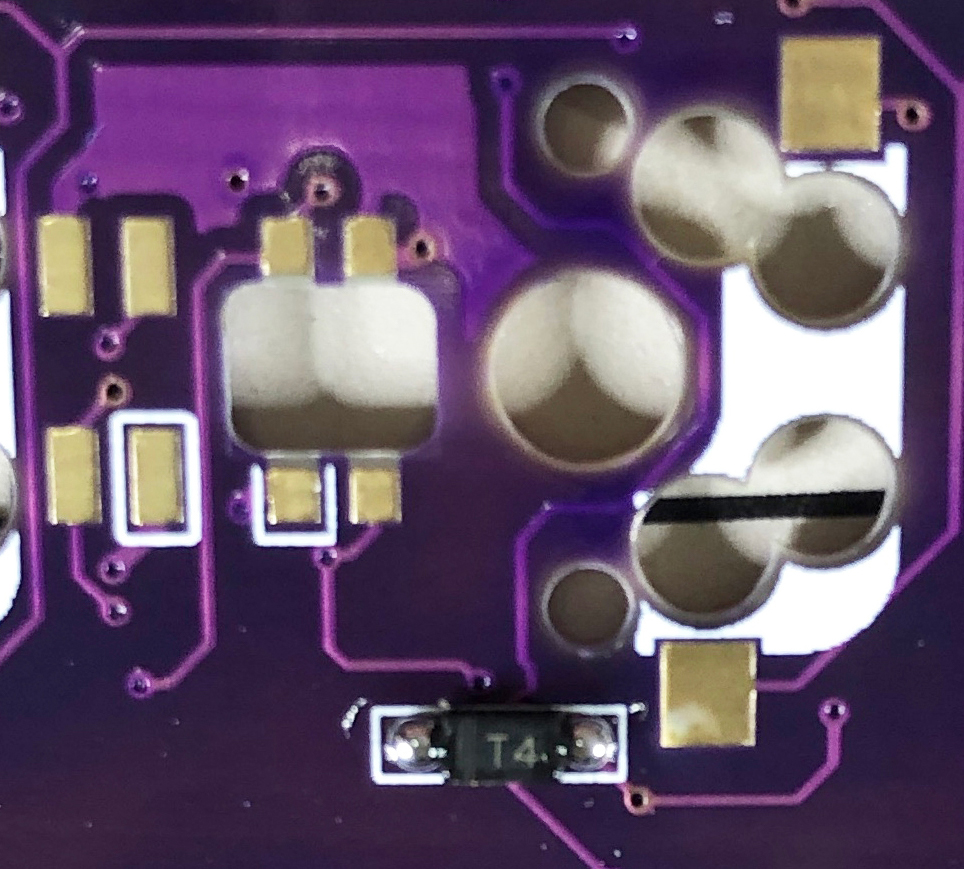
Footprints
Just like there are a few ways diodes can look, the place you solder them can look a few different ways too lets go over that so next time you go to solder a diode you know for sure what way to place it.

You can see above that all of these footprints look different, but they all have one thing in common both sides don't look the same. The side that is different is going to be the side that you put your marking towards weather thats an arrow pointing a square pad a little line thats the way that you place it.

If you are still unsure its time to pull out a multimeter, one side of a diode is always connected to a row or colum. So if you can find 2 diode pads that are connected together those are going to be your row pads. You connect your black bar to that side.
How to solder diodes?
Lets go over how to solder any diode.
SMD
The trick with SMD diodes is first, solder just one pad of the diode footprint.

Now orient your diode correctly (from the last section you should be a master at this).
Next, using some tweezers places one the diode on top of your little ball of solder and re-flow the solder you placed down, and let the diode fall into the pool of solder.
Using this method you should have one leg soldered now.
Note: if it does not look super clean thats ok you can fix the first side after you finish the other side.
Now go back and solder the other side of the pad this should be much easier, because its being held in place by the first side so you can use one hand on the solder and one on your iron.
Good job you did a smd diode, there is nothing to be afraid of they are quite easy and very fast.
-Tip: Do it in batches and solder one pad of every diode first then, place them all, then do the other side.
--Pro tip: If you get your diodes on a tape you can peal back 1cm of the tape and flip it over, hold it down and peal the rest off. Then lift up your tape and all your diodes are on the desk facing the same way, do this correctly oriented to your pcb and you can solder all the diodes in no time.
Through hole
Bend diodes to line up with holes.

Insert diodes into back of PCB and bend outwards from the front to keep them in place.

Solder each end of the diodes from the front of the PCB. Use flush cutters to trim the legs of the diodes.
Other uses in keyboards
By this point you should have a good understanding of the main use of a diode in a keyboard and how we install them what they look like. The next time you come across one you wont be afraid you will know just what to do.
Here at the end of this article I would like to just cover a few other times we use a diode just so your not a one trick pony.
Esd protection
Often we will find a diode that doest not work like other diodes, used in esd protection. This diode does not let electricity flow at all... Unless there is a lot of it like a static shock. Then it will open the flood gates so to speak and let it flow safely to ground.
Detection
Another time we use them it to tell if something is plugged in. For instance we may use one to let power flow from our usb port into our charging circuit but not straight into the battery. This same trick is used on pro-micros to be able to tell if the board is being powered over usb or TRRS.