A quick note before we go further
If your keyboard is sold as pre-soldered by default, or you have a Blok controller, you will probably not be able to use this guide and should follow this one.
Step 3: Flash Your Keyboard
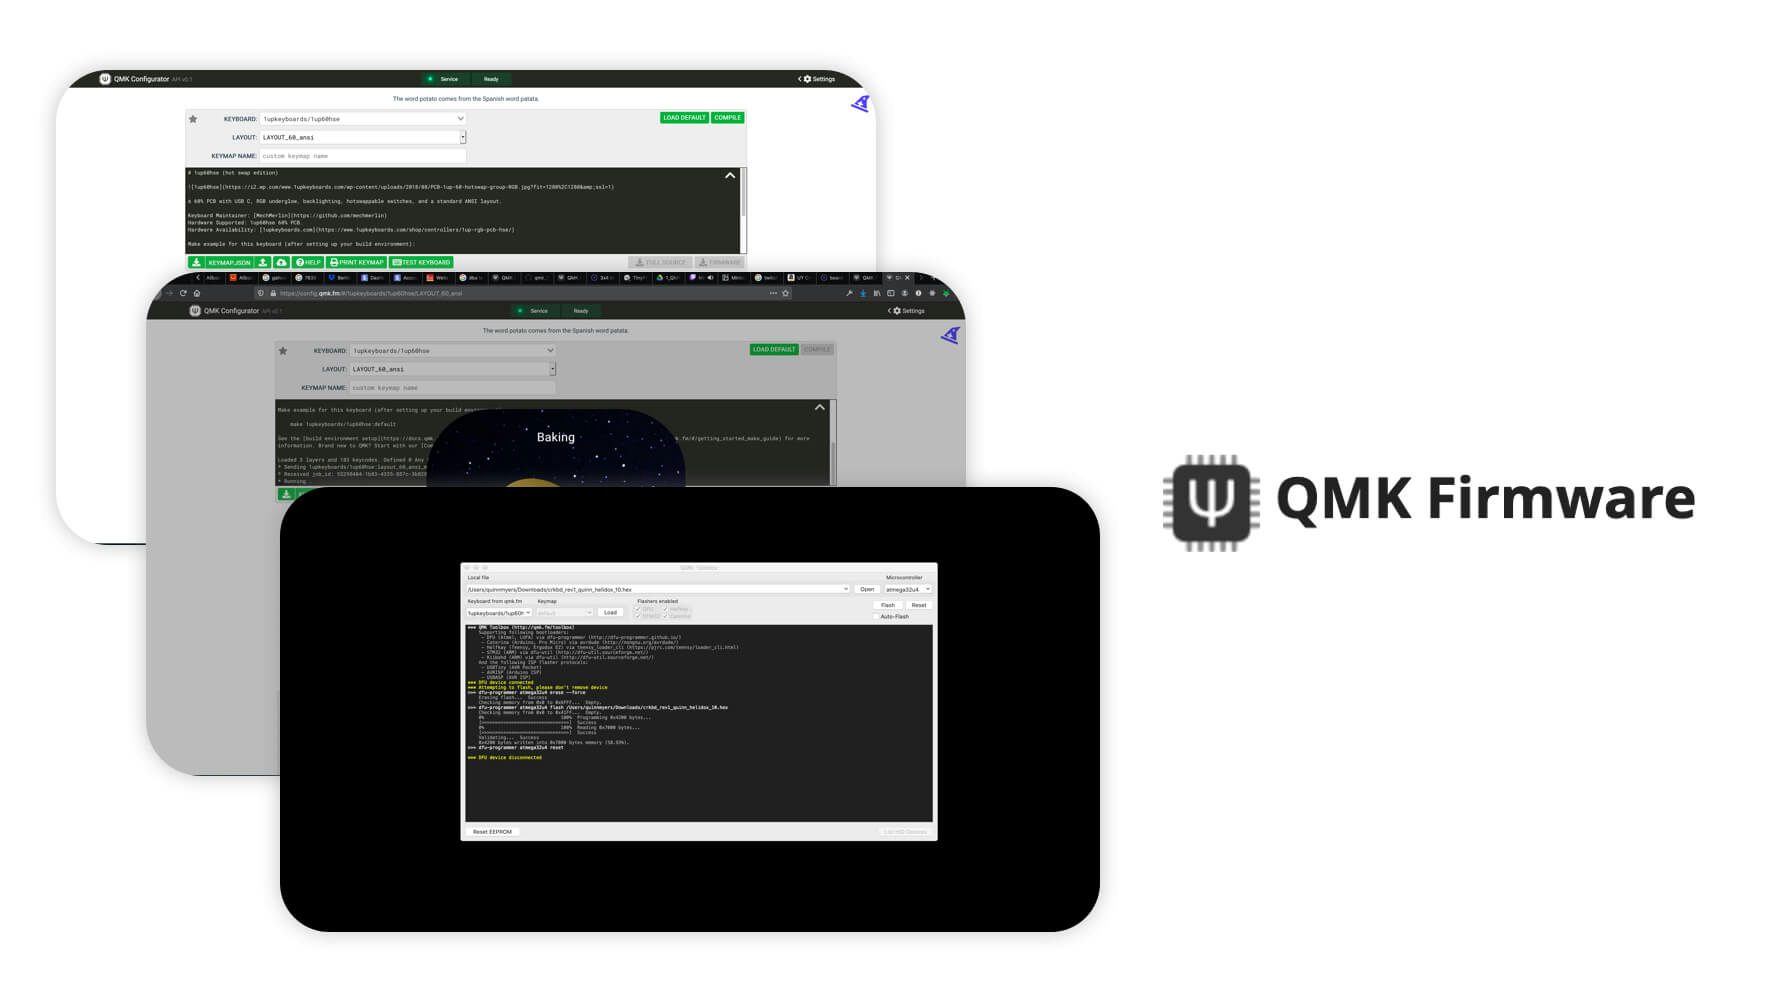
With the completed Keymap produced by QMK Configurator ready to go, we can move on to the next step and use the QMK Toolbox. If you don’t have that installed yet, head over to QMK Firmware - QMK Toolbox and download the software.
QMK Toolbox allows us to flash the Keymap onto our keyboard, and it is very easy to do so using the Toolbox.
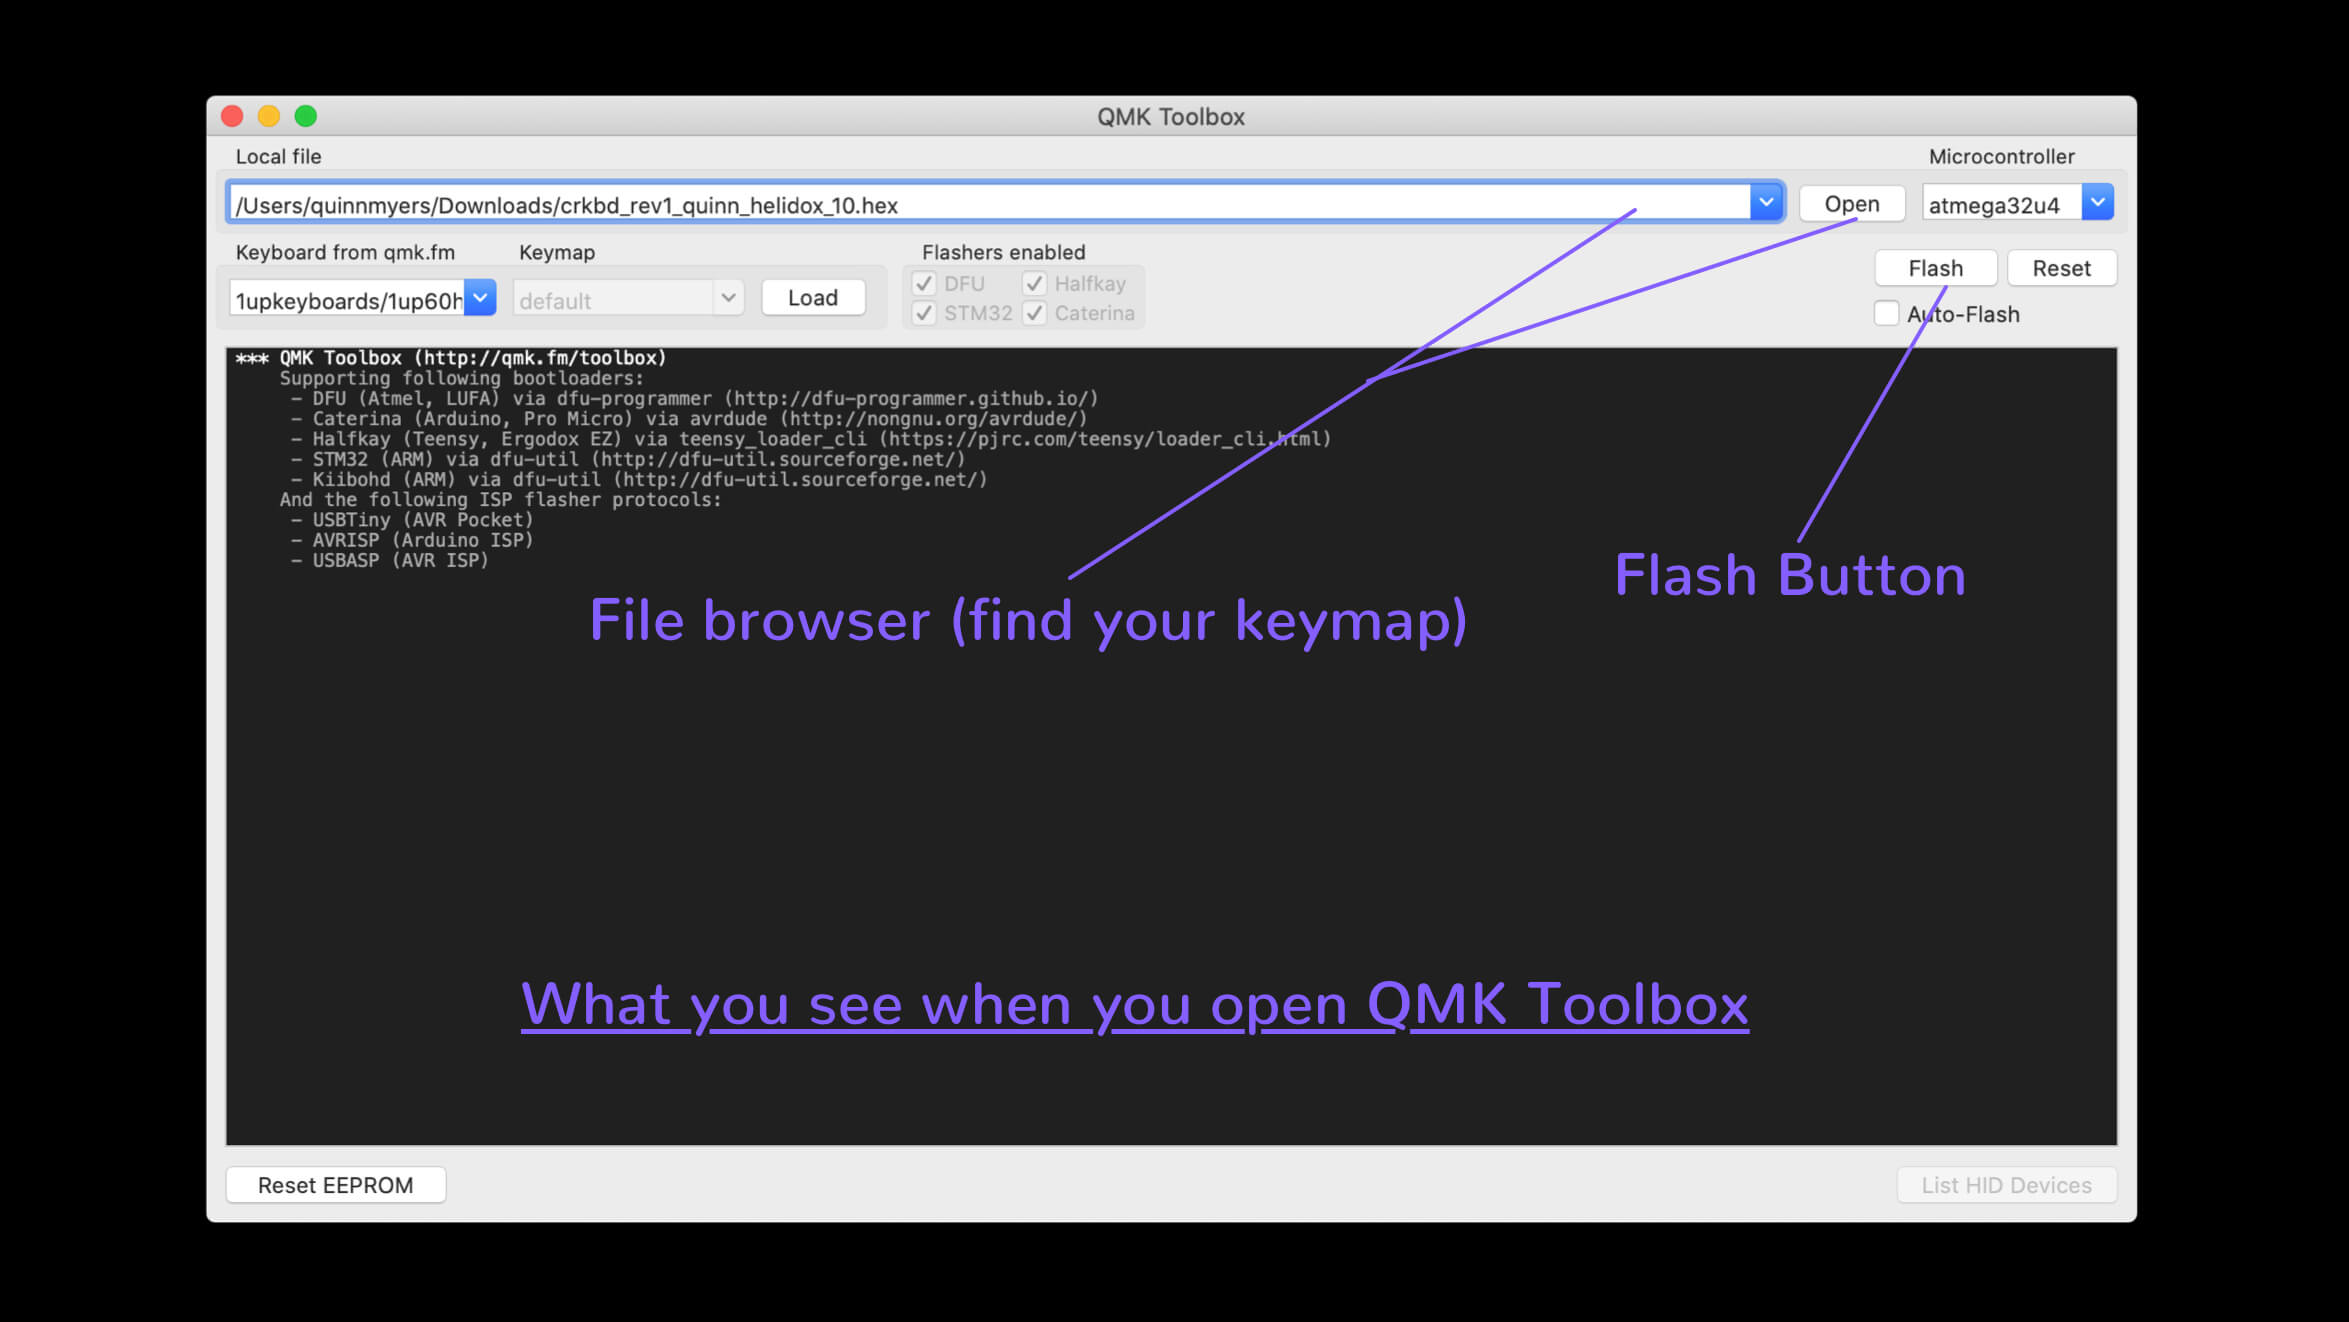
Open QMK Toolbox
Open QMK Toolbox, you should see something similar to this:
Connect Device to QMK Toolbox:
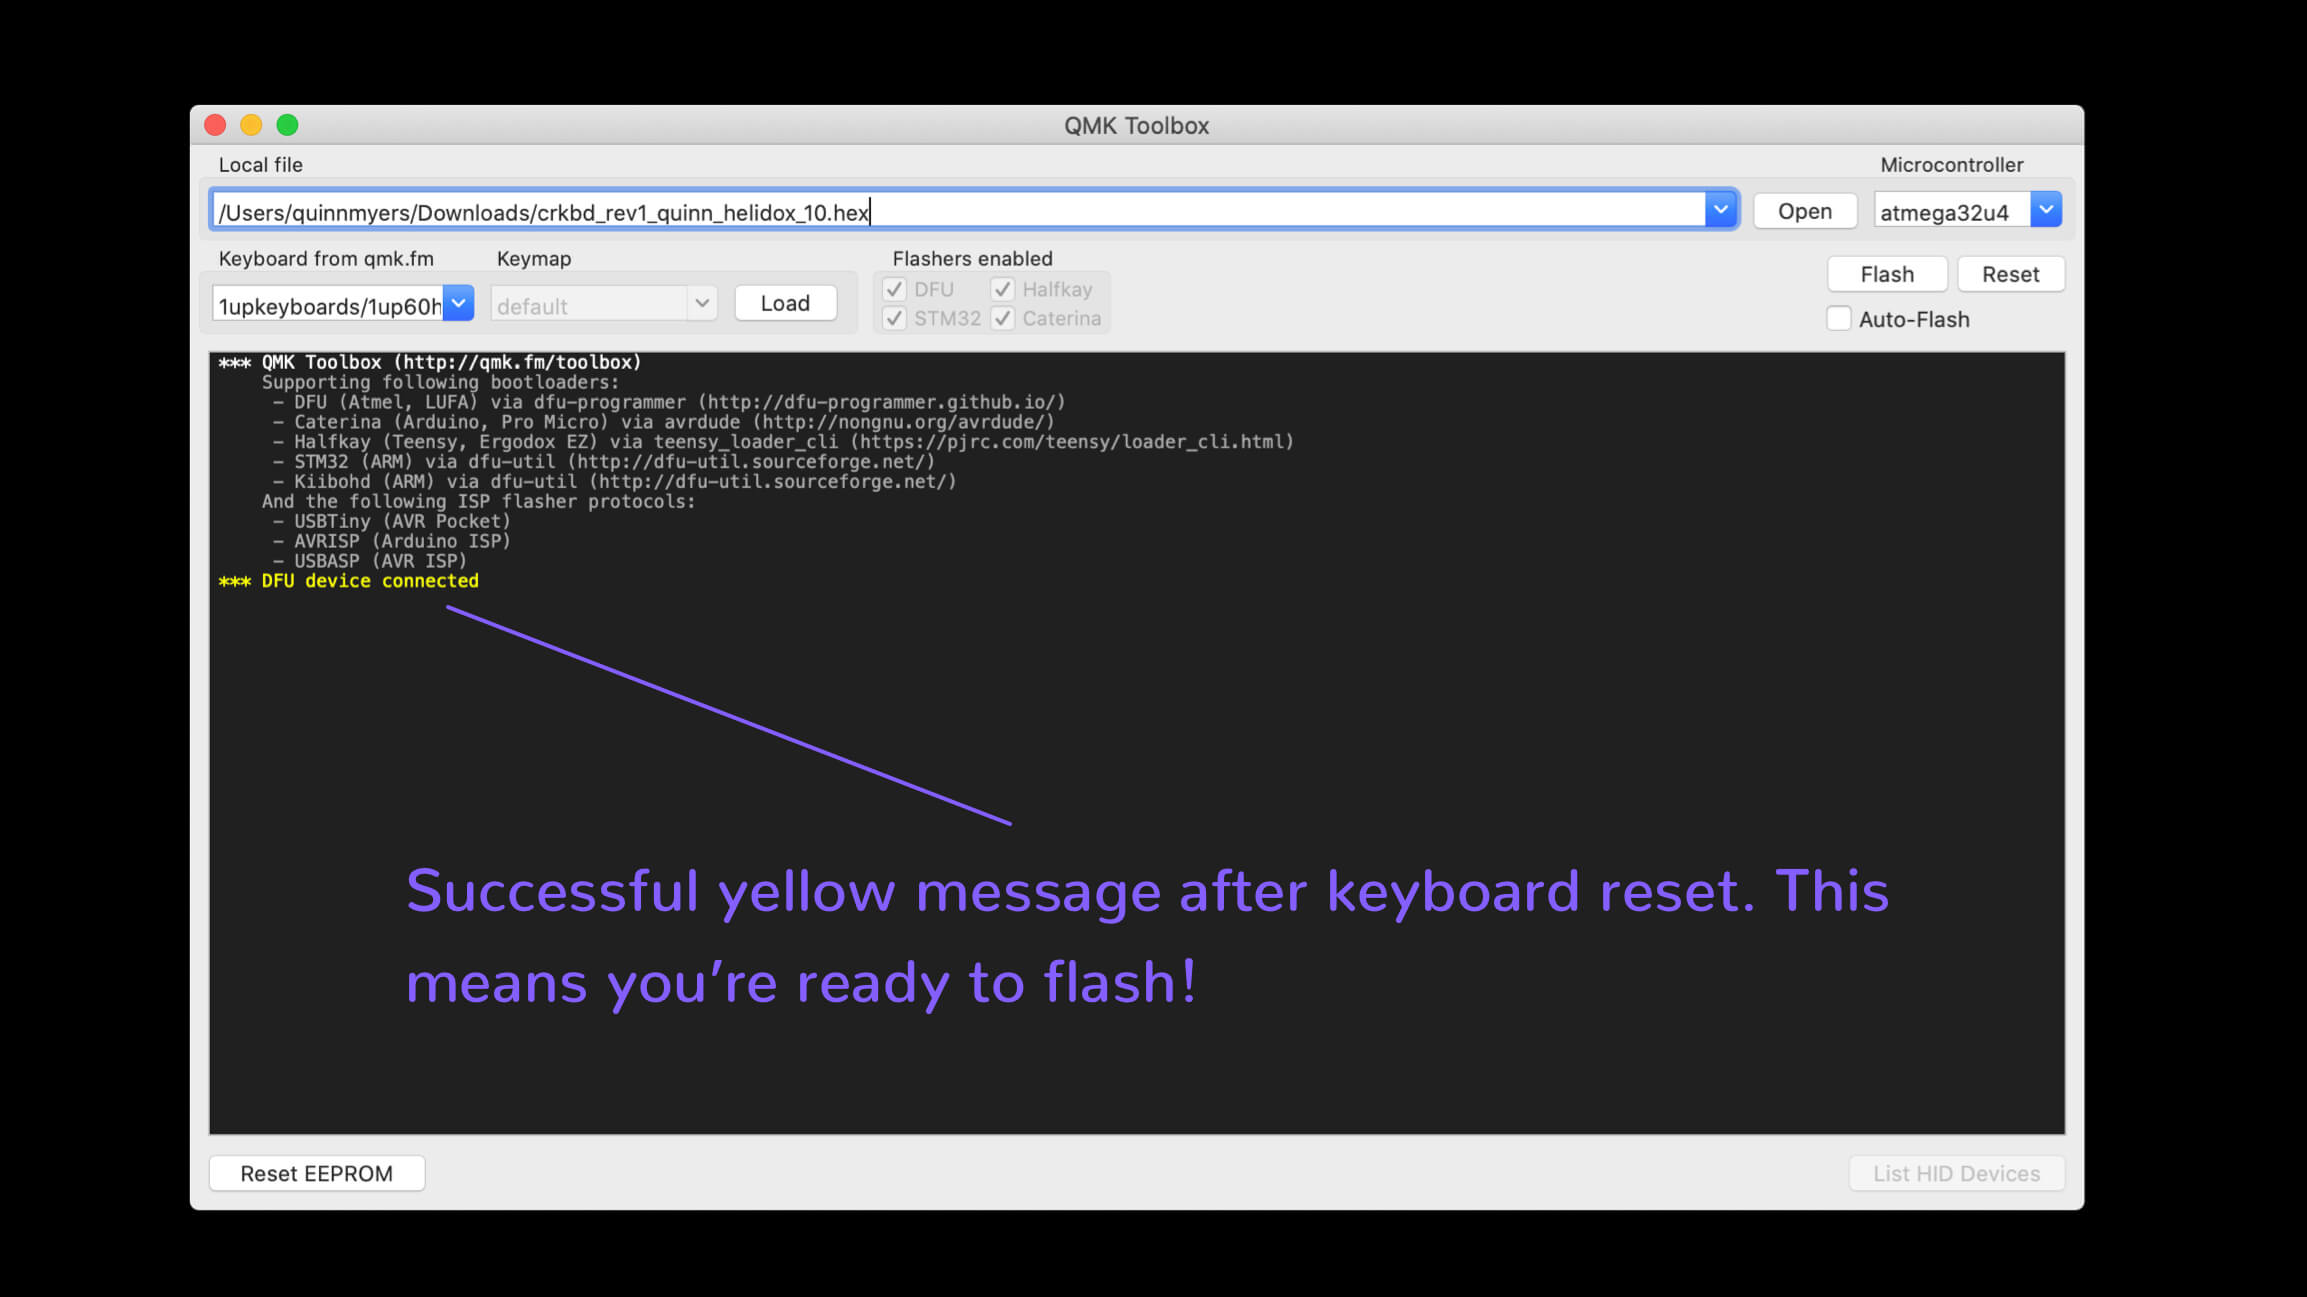
In order to flash the keyboard, we have to make QMK Toolbox recognize the device as something it can flash. In order to do, we must have QMK Toolbox open and then press the reset button on our keyboard while it is plugged in. If you’re using an Elite-C you can use the on-board reset button, if your keyboard kit has a reset switch included that you installed, simply press that reset switch. If you need help figuring out how to reset your keyboard, just ask us in Discord.
If you successfully reset your keyboard while it is plugged in with QMK Toolbox open, you should see this message in the photo below, written in yellow. If you see that message, you’re good to move on to the next step and you’re almost done!
Flash Keyboard
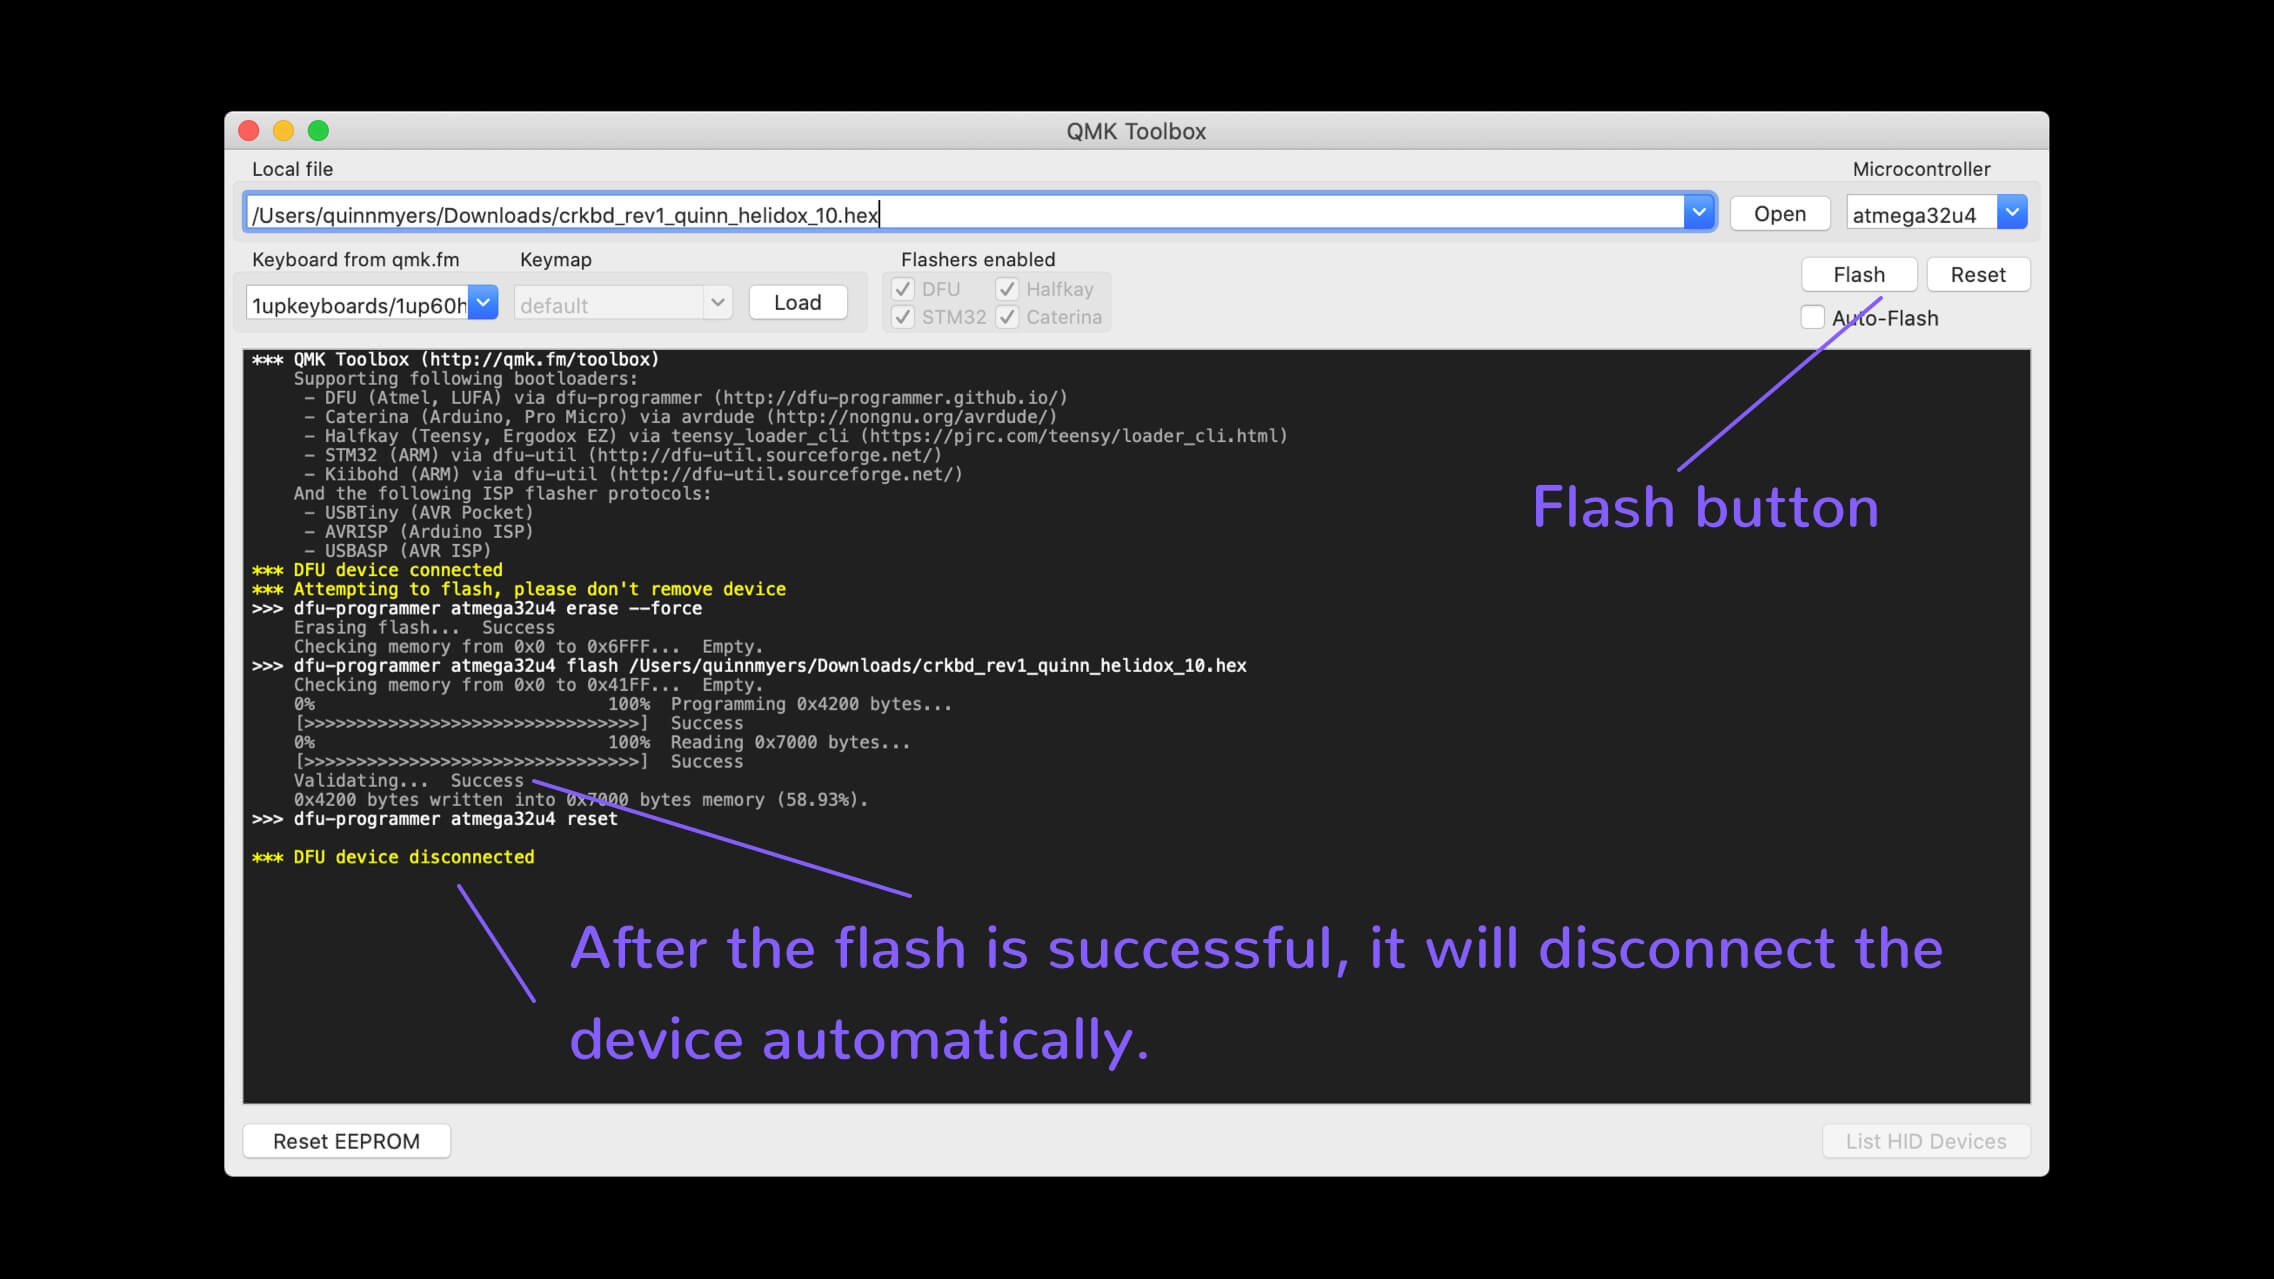
With your keyboard successfully reset and QMK recognizing it as a device it can flash, you’re ready to flash your Keymap! Using the file browser in QMK Toolbox navigate to the location you saved your Keymap (.hex file) earlier that QMK Configurator gave you. After you have the correct Keymap selected, you may click “Flash” in QMK Toolbox. If successful, it will read “DFU Device Disconnected,” because QMK Toolbox automatically disconnects your device after a successful flash, and a few lines above that you should see the work ‘success.’ If you are flashing a split keyboard, simply plug in your other half, reset it, and flash the same Keymap to that half. If you are flashing a non-split board, you’re done!
All Done
There you go, now you've successfully flashed a keyboard using QMK Configurator to build your map, and QMK Toolbox to flash the keymap onto your keyboard. If your keyboard is built properly, this should be a very smooth process. Now that you know the easy steps to follow to flash you keyboard, you can spend some time making the perfect keymap for yourself.