Getting started with ZMK on a GUI!
One of the big put off's for people with ZMK has been the lack of GUI tools and editing the keymap by hand. That's no longer the case thanks to Nick, one of the amazing community members. This will work with any keyboard that ZMK supports, and we are making it even easier to get up and running to start editing with their keymap editor on a brand new board!
Step 1: Pick your keyboard
We have made templates for our boards that support ZMK to make this easy for anyone without the need to ever open the command line. Just select your keyboard from the table below, and make sure you pick the controller that matches what's in your keyboard. For example the nice!nano (or SuperMini uses the nice!nano), or integrated if there is no controller that a user solders to the board.
| Nice!Nano/SuperMini | Blok | Integrated |
|---|---|---|
| x | x | Rechtek |
| Corne | x | x |
| Lily58/Lulu | x | x |
| Microdox v2 | x | x |
| Sweep | x | x |
| TG4X | x | x |
| 3x4 Macropad | x | x |
| Sofle | x | x |
Step 2: Create a repository from the template.
You will need a GitHub account for this. If you don't have one, take a moment
now to create one. Not only does this make working with ZMK easier, it means
that your keymaps are always backed up and ready for you anywhere in the world!
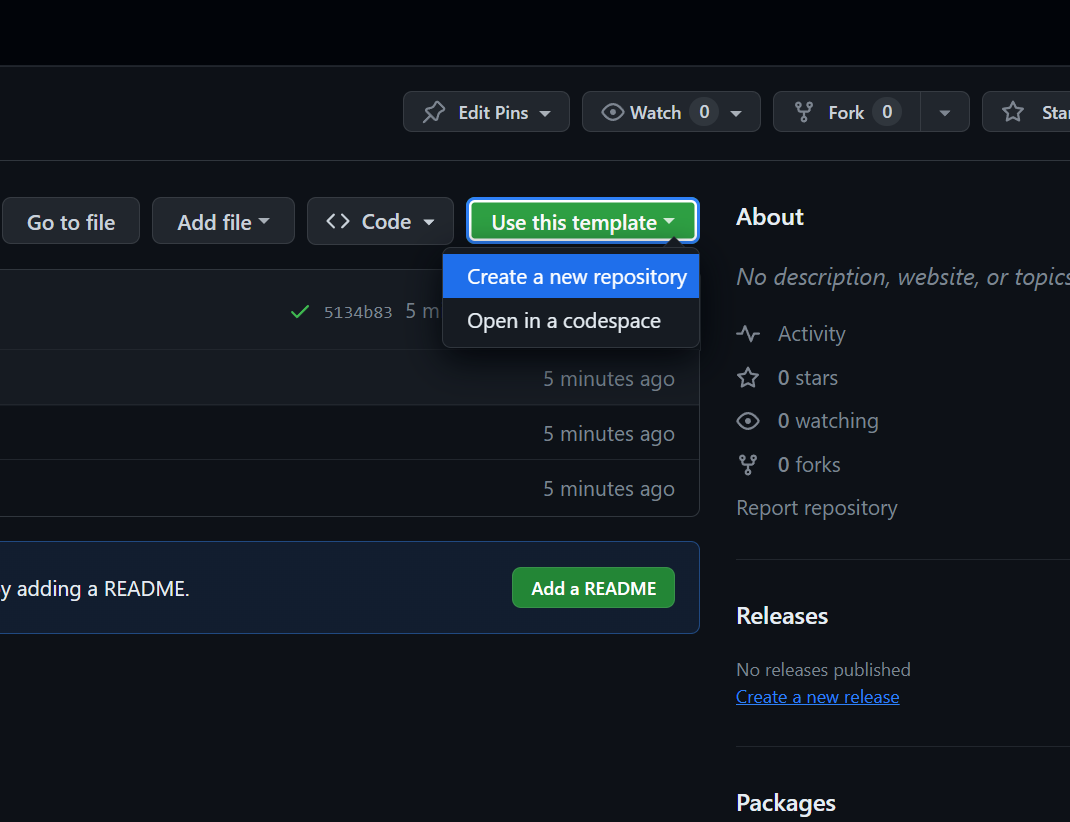
Once you have an account, and are logged in, you'll create a repository for your
keyboard like this. Make sure to name the repository something you'll remember.
Many people use zmk-keyboardNameHere
Step 3: Connect the GUI tool to the repository you created
At this point, we are almost there! We'll want to go to the keymap editor and follow the instructions given. It will want you to connect your code from GitHub to the tool so it can access and edit your keymap all in the tool.
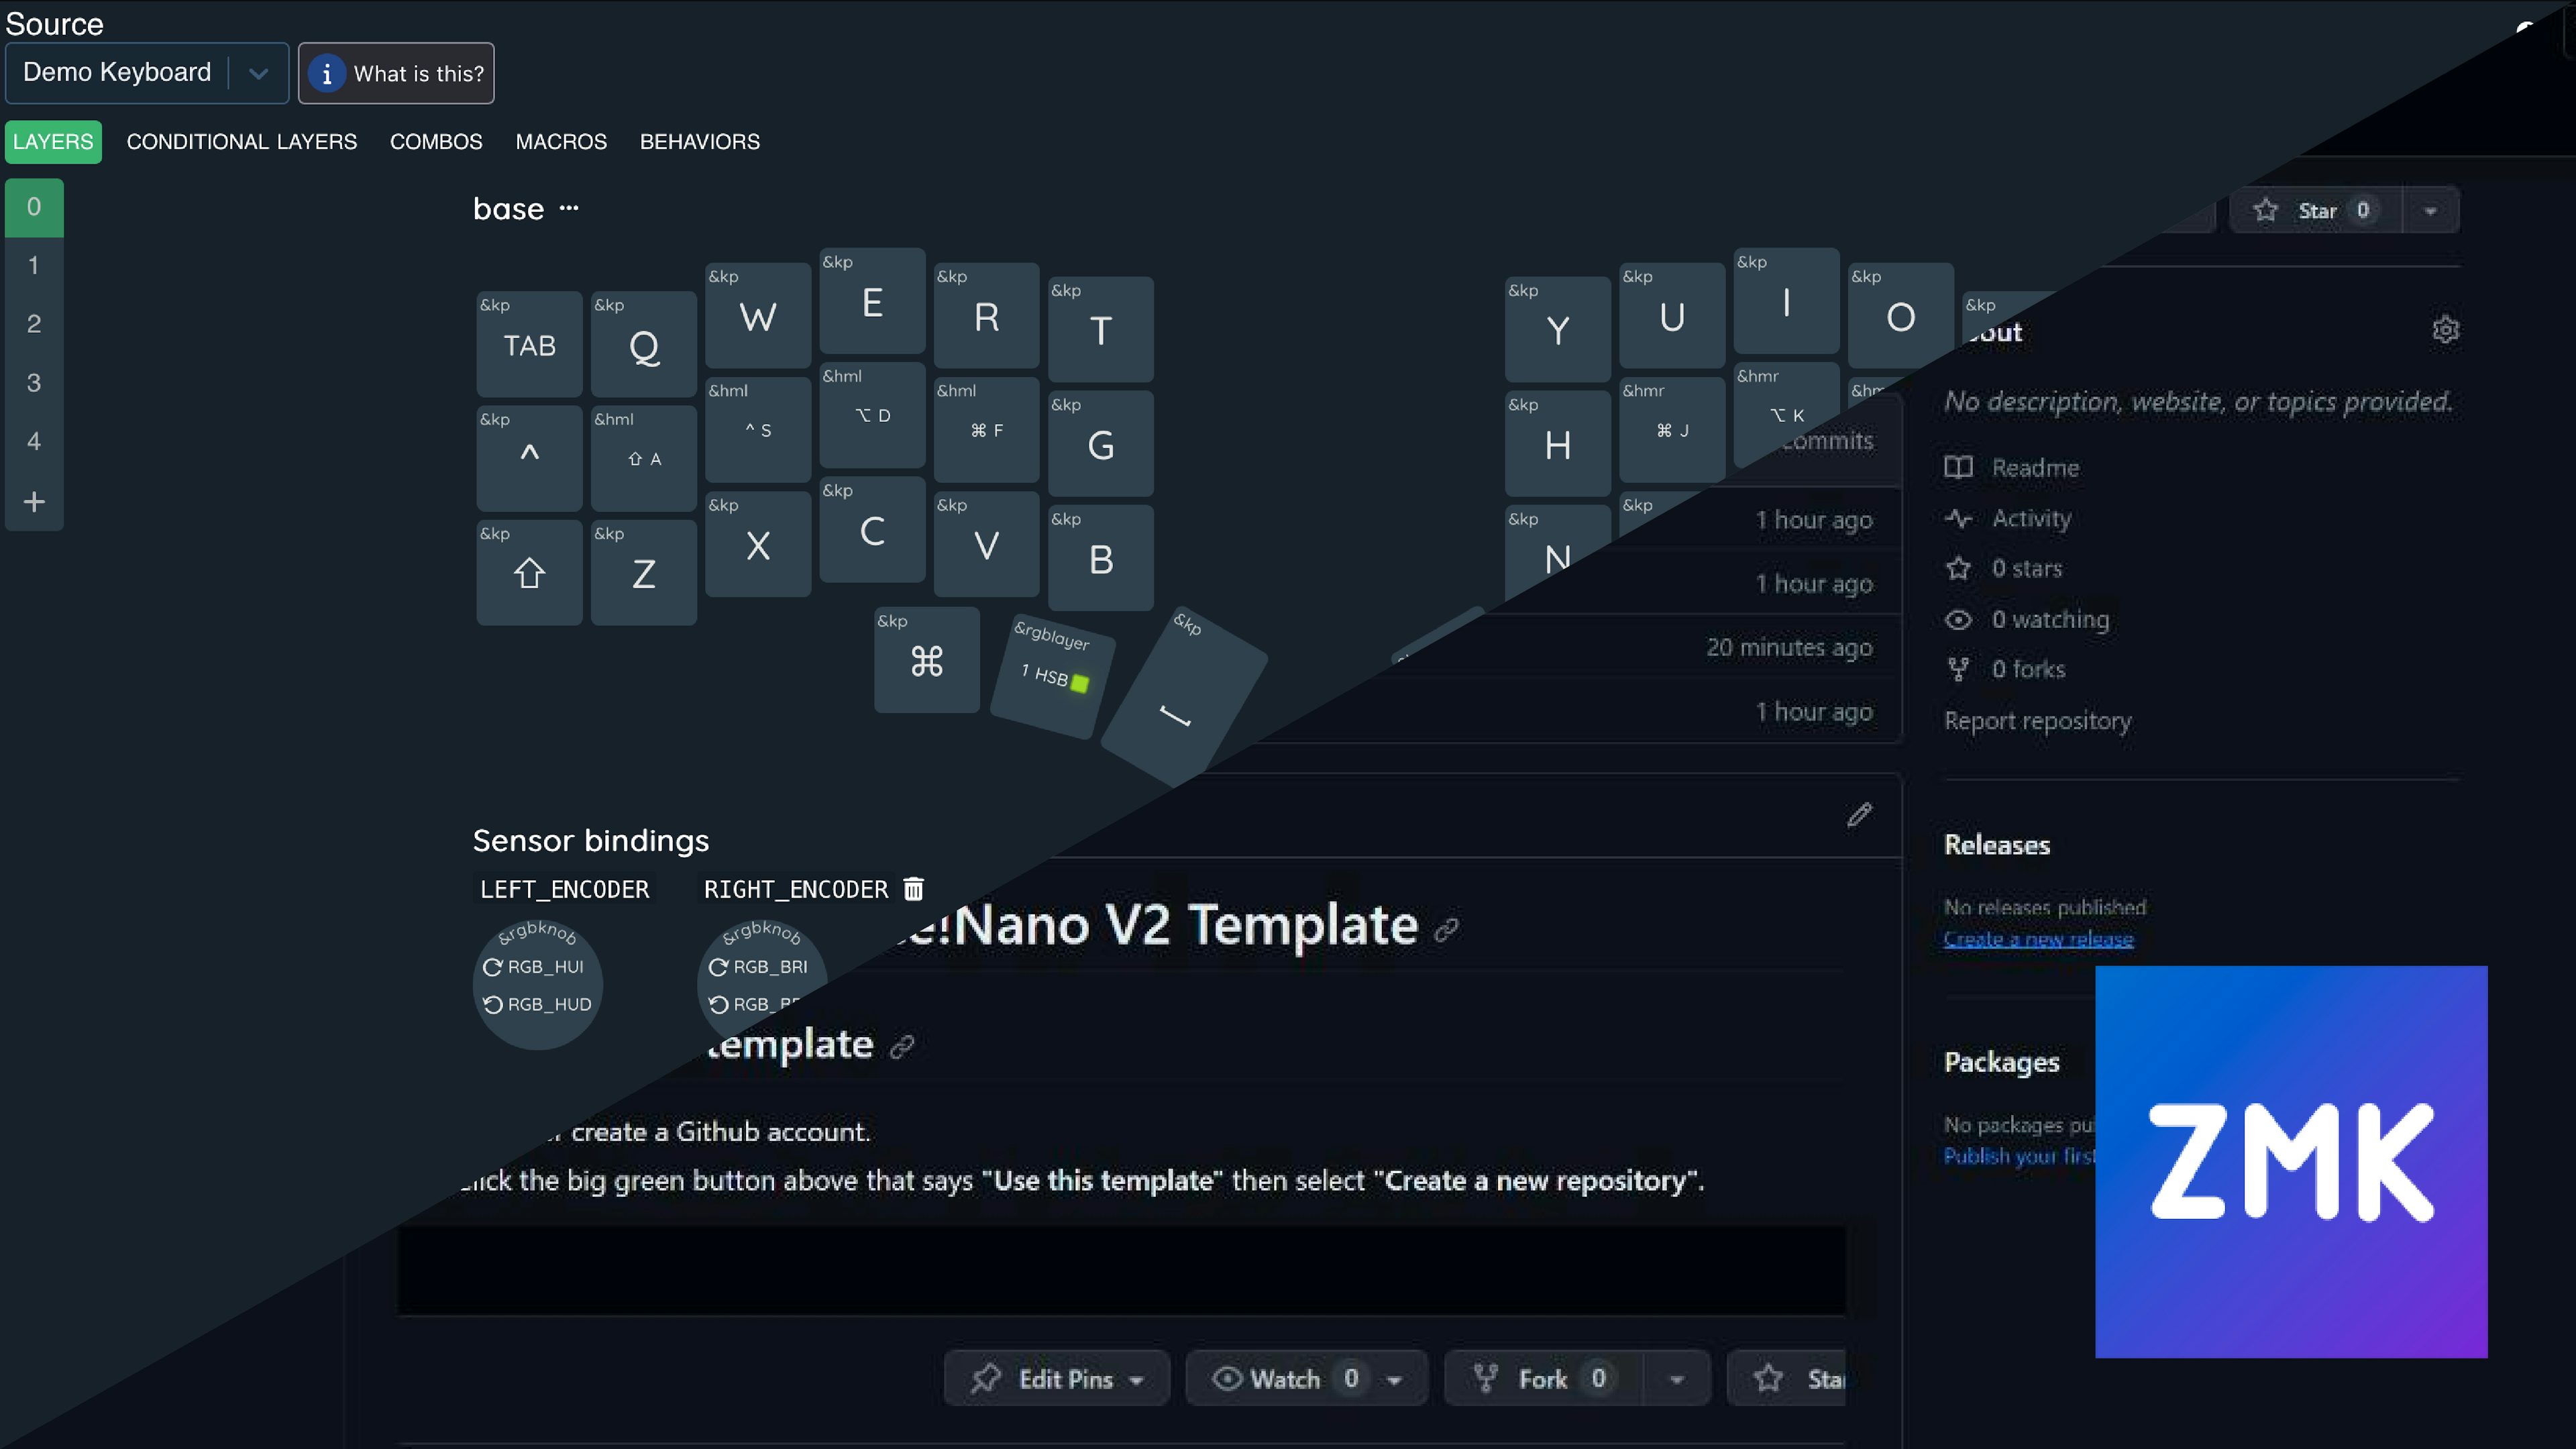
Step 4: Make changes to your keymap
Click on any key displayed on your keyboard. You should see a popup that lets you change the function of that key. Make any changes you want and move on to the next step.
Step 5: Getting the files for your keyboard

We have everything we want, and just have to put it on the keyboard. In the editor, there's a save icon at the top. Make sure to hit that, and then the button to the right. That will take you back to GitHub to get your firmware, built automatically for you!
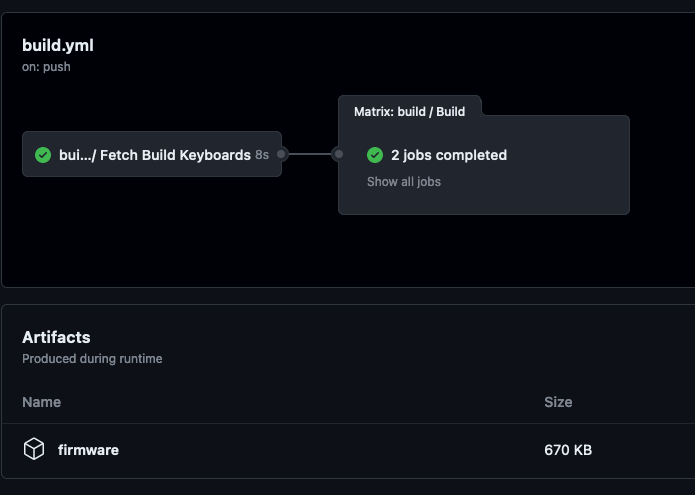
If you see a yellow spinning icon or text like 0/2 jobs completed, just wait a moment while it does the compiling for you. It may
take just a minute or two. Once it's all green, you'll see a file in the
Artifacts section called firmware.zip. Click that to download it. That's
your firmware ready to go for your board! Make sure to extract the zip into
UF2 files. Split keyboards get 2 firmware. One for left, and one for right.
Make sure to not mix them up.
Step 6: Flashing
This is the normal process for flashing your controller. With most controllers, you can double tap reset, and you'll have a "flash drive" show up on your system. You simply drop the UF2 file onto it, and it will flash and automatically reboot, ready to go as a keyboard.